Took this picture yesterday: Just For You!
Click on image to enlarge!
Good Morning! Thinking back, my old teacher in the one room school house one time said; “George, if you look close enough, the answers are always there—are you askin’ the right questions?”
It’s a rainy morning here in the north, but I can’t say it’s unwelcome as truth told we’ve needed this rain, especially with how dry it’s been over the past couple of weeks. The trees and plants are soaking it up, and it’ll do them good as they get ready for their dormant stage over the winter. On the bright side of things, my instincts were right on the money once again, as I managed to get all our firewood in for winter, take care of the gardens, and cover the decks with wood preservative, among a ton of other tasks—all done just in time before the rainy, cooler weather set in.
I’ve trusted my instincts for most of my life, and they’ve served me well. It’s funny, really—everyone has the ability to trust their intuitions, but you know, not many seem to use it. Most don’t even realize they have it. But I’ve always found that when you listen, it usually steers you in the right direction.
Highway 522 was pretty quiet yesterday, but despite that, we had a steady stream of folks dropping by our gift shop again. It’s always nice to see new faces, and even better to hear them say how much they appreciate the one-of-a-kind items we make. Things you just can’t find anywhere else.
On another note, yesterday my body needed a rest, so I spent the day working at my computer on some YouTube videos, editing and getting things just right. I really do enjoy making these videos when I have the time, but there’s a lot of work that goes into it. Setting up cameras and ensuring the lighting is just right takes a lot of effort. It requires persistence, too; and not everything goes smoothly all the time, but when you finally get it right, the reward is well worth it.
The whole idea of my channel, “Reviving the Simple Life,” is to capture those everyday moments that many folks might not have seen before. After I finished a couple of videos, I added them to my collection, which I’ll be making public throughout the winter months, sharing my daily routine as an old feller going about life.
With that, I’m off for breakfast once again, courtesy of my lovely wife. After that, I’ll get back to work on those videos, making sure to keep the simple life alive and well. Here’s to another day of small joys and quiet moments!
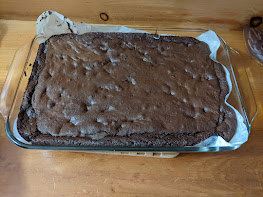
You all have a great day, and I hope it’s as bright as a sunlit morning and—as sweet as my wife’s homemade brownies.
The image below might not give you a taste, I’ll do that for ya, but sure to get your mouth to watering. GW
All my books are available on my Amazon Author Page.
If you purchase a book, a brief Amazon review really helps new readers discover my work—it means a lot.
Support my writing: Support My Writing
In Closing, I Would Like to Wish You Well!
George Walters |
[email protected]