Category Archives: Gardening

Spot for you to do some reading on gardening and staying healthy. Also a great place to put your feet up and relax for a bit.

Living On a Shoestring

Living on a shoestring is all about making every penny count. It can be tough, but with some good old-fashioned skimping you can make it work. As a country boy, I know a thing or two about living simply, and I’m happy to share some tips on how my lovely wife and I got by when times were tough.

  1. Cook from scratch

Eating out can be expensive, and buying pre-packaged meals can add up quickly. Instead, learn to cook from scratch. Buy basic ingredients like rice, beans, and pasta, and learn to make meals from them Not only is it cheaper, but it’s also healthier and often tastes better than pre-packaged food.

  1. Shop at thrift stores

Buying brand-new clothes can be expensive, but shopping at thrift stores can save you a bundle. You can find gently used clothes for a fraction of the cost of new ones. Plus, you might even stumble upon some hidden gems.

  1. Learn to mend and repair

Instead of throwing away clothes or household items that are broken, learn to mend and repair them. Sewing on a button or patching a hole can save you from having to buy new items. It’s also a useful skill to have for the future.

  1. Use coupons and discounts

Don’t be too proud to use coupons and discounts. They can save you a lot of money, especially on groceries and household items. Keep an eye out for deals and sales, and always compare prices before making a purchase.

  1. Cut back on unnecessary expenses

Take a look at your monthly expenses and see where you can cut back. Cancel subscriptions that you don’t use, switch to a cheaper phone plan, and reduce your energy usage. Small changes can add up to big savings over time.
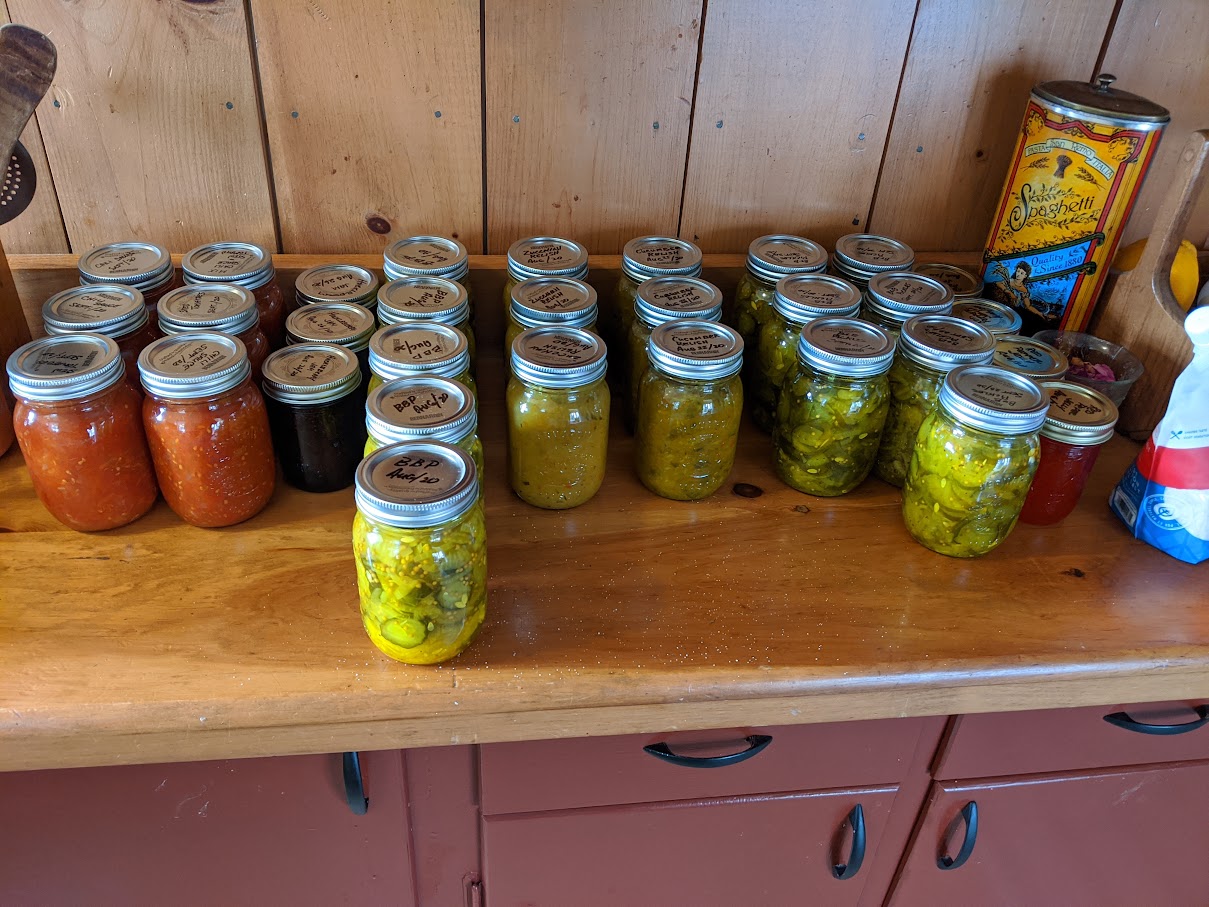
  1. Grow your own food

If you have the space, consider growing your own fruits and vegetables. You don’t need a big garden to get started – even a few potted plants can provide you with fresh produce. Not only is it cheaper, but it’s also a fun and rewarding hobby.

  1. Make your own cleaning products

Instead of buying expensive cleaning products, make your own using simple ingredients like vinegar, baking soda, and lemon juice. Not only is it cheaper, but it’s also more environmentally friendly.

  1. Learn to enjoy simple pleasures

Living on a shoestring doesn’t mean you have to give up on fun and enjoyment. Learn to appreciate simple pleasures like reading a book, taking a walk in nature, or having a picnic. These activities are often free or low-cost, but can provide just as much joy as more expensive pursuits.

In conclusion, living on a shoestring is all about being resourceful, frugal, and creative. It can be tough, but with some effort and scrimping, and determination, you can make it work. By cooking from scratch, shopping at thrift stores, learning to mend and repair, fixing your own equipment, using coupons and discounts, cutting back on unnecessary expenses, growing your own food, making your own cleaning products, and learning to enjoy simple pleasures, you can stretch your dollars further and make the most of what you have.

Have a great day. GW

Why We Should Return to Doing up Preserves

Here are just a few of what my wife does up every summer.

Click on image to enlarge!

I had an email the other day asking me if I had any way of easing the grocery bill a bit. Well, here is what I came up with.

Back in the day, folks like my lovely wife and I relied on preserving our own food to get through the long winter months. My wife would pickle, can, and ferment fruits and vegetables, so we could enjoy them all year round. And let me tell you, it saved us a lot of money. But not only is preserving your own food a great way to save money, it’s also good for your health.

Because when you make your own preserves, you’re in control of what goes into them. That means you can avoid all the extra salt, sugar, and preservatives that are often found in store-bought canned goods. Plus, you can make sure you’re using high-quality ingredients, like fresh, organic produce that is grown right here in Canada. This can help you maintain a healthy diet and reduce your risk of health problems down the road.

Preserving your own food can also help you reduce food waste, the reason being that when you have an abundance of fruits and veggies, it can be tough to use them all up before they go bad. But by canning or pickling them, you can extend their shelf life by months, or even years. This means you can enjoy your favorite foods all year round without having to worry about them spoiling.

And let’s not forget about the satisfaction that comes with making your own preserves. There’s something special about filling up jars with your own homemade jams or pickles. It’s a great way to connect with your food and appreciate the effort that goes into growing and preparing it.

So if you’re looking for a way to save money on food and eat healthier, why not consider making your own preserves. Not only will you be getting back to your roots and embracing a bit of country living, but you’ll also be doing your body and your wallet a favor. So go ahead and give it a try – you might just be surprised at how easy and fun it is! GW

Eating Meat

Some have asked George, what do you think about eating the meat that is out there today? Well, it’s my opinion that it’s important to eat both meat and veggies, especially the fresh organic things that are grown right here in Canada by our hardworking farmers.

First off, meat is a mighty fine source of protein and other important nutrients like iron and vitamin B12. It can help build and repair muscles, keep your immune system strong, and give you plenty of energy to work hard and play harder. But just like with anything, too much of a good thing ain’t always good. Eating too much meat can lead to health problems like heart disease and high cholesterol.

That’s where fresh veggies and fruits come in. They’re packed with all kinds of good stuff, like vitamins, minerals, and fiber. Eating plenty of veggies and fruits can help you feel full, give you energy, and keep your body healthy and strong. Plus, they taste darn good, especially when they’re grown right here in Canada by our local farmers.

When you eat veggies and fruits that are in season and grown close to home, you’re supporting your local community and helping to reduce your carbon footprint. That’s because food that’s grown locally doesn’t have to travel as far to get to your plate, which means less fuel is needed to transport it.

Plus, when you buy from Canadian farmers, you know you’re getting food that’s been grown with care and attention to quality. Our farmers work hard to produce the best crops possible, using sustainable and environmentally-friendly practices that protect the land for future generations.

So, for what it’s worth, I feel it’s important to eat meat occasionally to get the protein and nutrients your body needs, but it’s also crucial to eat plenty of fresh veggies and fruits, especially the ones grown right here in Canada. Not only will you be supporting your local community, but you’ll also be doing your part to take care of your health and the environment.

That’s all I have on the subject. GW

Putting up Birdhouses

Here’s a blog post on why I think putting up bird houses is a good idea these days.

Nowadays, there’s a lot of talk about how we need to take care of the planet. And one way we can do that is by puttin’ up bird houses. You might be wonderin’, “Why in tarnation should I put up a bird house? Ain’t birds supposed to just find their own homes?” Well, let me tell you, there are a few good reasons why you should consider puttin’ up a bird house or two.

  1. Helpin’ Out the Feathered Friends

First and foremost, bird houses give our feathered friends a safe and cozy place to call home. With so much development happenin’ these days, there ain’t as many natural spaces for birds to nest in. By puttin’ up a bird house, you’re givin’ them a place to raise their young ‘uns without worryin’ about predators or other dangers.

  1. Keepin’ the Critters in Check

Believe it or not, birds are nature’s pest control. They eat bugs, insects, and other critters that might damage your garden or crops. By attractin’ birds to your yard with a bird house, you’re helpin’ to keep those pests in check without the need for harmful chemicals or other measures.

  1. Connectin’ with Nature

There’s somethin’ mighty special about watchin’ birds go about their daily business. They’re colorful, graceful, and just plain fascinatin’ to watch. By puttin’ up a bird house, you’re givin’ yourself a chance to connect with nature in a whole new way.

  1. Decoratin’ Your Yard

Let’s be honest, bird houses can also add a touch of rustic charm to your yard. They come in all sorts of shapes and sizes, so you can find one that fits your style. Plus, they make for a fun DIY project if you’re handy with tools and materials.

So there you have it, folks. Four good reasons why puttin’ up a bird house is a mighty fine idea. Whether you’re lookin’ to help out your feathered friends, keep pests in check, connect with nature, or just add a bit of country charm to your yard, a bird house can do the trick. So get out there, grab yourself a bird house, and start attractin’ some feathered friends to your neck of the woods! GW

Morel Mushrooms

It’s That Time Of Year!

Morel mushrooms are a delicacy for food enthusiasts, known for their unique and earthy flavor. These mushrooms are found in the wild and are sought after by foragers during spring. In this blog post, I will discuss where to look for morel mushrooms, how to identify them, and how to prepare them for eating.

Where to Look for Morel Mushrooms

Morel mushrooms are typically found in moist areas such as woodlands, forests, and riverbanks. They prefer to grow in areas with a moderate climate and a good amount of rainfall. If you’re looking to find morel mushrooms, it’s best to head out in the springtime, typically between late March and early May, depending on your location.

When looking for morel mushrooms, it’s important to keep an eye out for dead or dying trees, especially those with bark that’s peeling away. The mushrooms tend to grow near the base of these trees, so be sure to check around the roots as well. Morels can also be found near streams and other bodies of water.

How to Identify Morel Mushrooms

Identifying morel mushrooms can be tricky, but there are a few key characteristics to look for. Morels have a distinct shape that sets them apart from other mushrooms. They are cone-shaped with a ridged and pitted exterior. The ridges run vertically along the cap and the stem, while the pits are deep and honeycombed.

The cap of a morel mushroom is typically 1-4 inches tall and 1–2 inches wide. It’s important to note that the cap will be attached directly to the stem, rather than being free like many other mushrooms. The stem of a morel mushroom is usually 2–4 inches long and about the same width as the cap.

When identifying morels, it’s also important to note their color. Morels can range in color from light brown to dark brown, and they may even have a yellow or grayish hue. The color can vary depending on the location and age of the mushroom.

How to Prepare Morel Mushrooms for Eating

Once you’ve harvested your morel mushrooms, it’s important to clean them thoroughly before cooking. Morels have a tendency to collect dirt and debris, so be sure to rinse them thoroughly in cold water. Some foragers even soak the mushrooms in saltwater for a few hours to remove any insects or debris that may be hidden inside.

Morel mushrooms can be prepared in a variety of ways, including sautéed, roasted, or fried. One popular way to prepare morels is to stuff them with a mixture of cheese, breadcrumbs, and herbs before baking them in the oven. They can also be added to soups and stews for a hearty and flavorful addition.

When is the Best Time to Harvest Morel Mushrooms?

The best time to harvest morel mushrooms is in the springtime, typically between late March and early May. The exact timing can vary depending on your location and the weather conditions. It’s important to wait until the mushrooms have fully matured before harvesting them, as immature morels can be toxic. So if you’re unsure, it is best to ask an expert as with any mushroom, Mushrooms are delicious, but there are a lot that are deadly.

In conclusion, morel mushrooms are a tasty and unique addition to any meal. If you’re looking to forage for morels, be sure to head out in the springtime and keep an eye out for dead or dying trees. When identifying morels, look for their distinct cone shape, ridged and pitted exterior, and range of colors. And when preparing them for eating, be sure to clean them thoroughly and experiment with different cooking methods.

Fertilizing your Vegetable Garden the Old Way

Howdy folks, George here! Today, I want to talk to you about fertilizing your vegetable garden with natural ingredients the old way. As someone who’s been tending to crops for as long as I can remember, I can tell you that the best way to feed your veggies is by going back to basics and using ingredients that Mother Nature intended. And trust me, it’s a heck of a lot more fun than buying a bunch of fancy, chemical-laden fertilizers.

So, what exactly are these natural ingredients, you ask? Well, let me tell you. First up, we’ve got good old-fashioned manure. Yes, I know it’s not the most glamorous thing in the world, but hear me out. Cow, horse, chicken, or even rabbit manure can work wonders for your soil. Not only does it provide a good source of nitrogen, but it also helps with water retention and soil structure. Just make sure you let it age for a bit before using it, otherwise you’ll be in for a real stinky surprise.

Next up, we’ve got compost. Now, this may not be the most exciting ingredient either, but it’s definitely one of the most effective. Compost is basically decayed organic matter, like leaves, grass clippings, and kitchen scraps. When added to your soil, it helps to improve its texture, adds beneficial microorganisms, and provides a slow-release source of nutrients. Plus, it’s a great way to reduce waste and make use of things you would have otherwise thrown away.

If you’re looking to add some specific nutrients to your soil, there are plenty of other natural options out there. For example, if you need more phosphorus, bone meal or rock phosphate can do the trick. If you need more potassium, wood ash or kelp meal are good options. And if you need more calcium, you can try adding some crushed eggshells.

Now, I know what some of you may be thinking. “But George, isn’t using natural fertilizers more work than just buying something from the store?” Well, yeah, it might take a little more effort on your part. But think about it this way: when you use natural fertilizers, you’re not just nourishing your plants, you’re also nourishing the soil. And healthy soil means healthy plants, which means healthier and tastier veggies for you to enjoy. Plus, you’ll be doing your part to reduce chemical runoff and promote sustainable agriculture.

So there you have it, folks. Fertilizing your vegetable garden with natural ingredients may not be the flashiest option out there, but it’s definitely one of the most effective. And who knows, you might even find yourself enjoying the process. Just don’t forget to wash your hands afterwards!

Until next time,

A Forgotten Treasure

Being a farmer for a good number of years, I’ve had my fair share of pest problems. Ants, in particular, seem to be a never-ending battle. But fear not, for there is a solution that has been around for over a century – 20 Mule Team Borax.

First things first, what is 20 Mule Team Borax? Well, it’s a powder cleanser that’s been around since 1891. It’s made from a naturally occurring mineral called boron and is commonly used as a laundry detergent booster. But, as I’ve discovered, it’s also a powerful weapon against ants and other pesky insects.

You see, ants are attracted to sugar and anything sweet. So, if you want to get rid of them, you need to create a bait that they’ll be unable to resist. Here’s where the 20 Mule Team Borax comes in – mix it with sugar and water to create a deadly concoction that will eliminate those pesky ants.

Now, before we go any further, let’s talk about safety. Borax is a naturally occurring mineral, but that doesn’t mean it’s completely harmless. You should always wear gloves and a mask when handling it, and keep it away from children and pets.

Back to the fun stuff – creating your own ant-killing mixture! Here’s what you’ll need:

  • 1 cup of sugar
  • 1/2 cup of 20 Mule Team Borax
  • 1 1/2 cups of warm water

Mix everything together until the sugar and borax have dissolved. Then, soak cotton balls or a piece of paper towel in the mixture and place them near where you’ve seen the ants. The ants will take the bait back to their colony and share it with the others, ultimately killing the entire colony.

Now, if you’re anything like me, you might be wondering if this mixture will also attract other insects. The good news is that it doesn’t seem to attract anything else besides ants. So, you can use it without worrying about creating a new pest problem.

But, if you’re feeling particularly adventurous, you can also use 20 Mule Team Borax to control other insects. For example, you can sprinkle it around your plants to deter slugs and snails. Just be sure to keep it away from the plants themselves, as it can be harmful to them.

In conclusion, 20 Mule Team Borax is a great tool to have in your pest control arsenal. It’s effective, affordable, and has been around for over a century. Just remember to use it safely and keep it away from children and pets. And who knows, maybe one day we’ll be able to market it as “Ant-Killing Borax – Accept No Imitations!”

Rainy Old Day Here In The North

April showers bring May flowers, or so the saying goes. And while it might be tempting to grumble about the rainy weather that seems to follow us everywhere this time of year, there are actually plenty of benefits to all that precipitation. Especially up here in the northern part of the world, where April can be a pretty dreary month, as it is today.

First and foremost, rain in April means that we’re finally starting to say goodbye to winter. No more snow (hopefully), no more icy walkways, no more scraping frost off your windshield in the morning. Instead, we get to enjoy the fresh scent of rain. It’s a refreshing change of pace after a long, cold winter.

Rain in April is also great news for gardeners. All that moisture helps to nourish the soil, making it easier for plants to grow and flourish. In fact, some plants actually prefer a little rain this time of year – think of those early spring flowers like daffodils and tulips, which practically dance in the rain.

And let’s not forget the benefits of all that rain on our lawns and gardens. A good downpour can help to wash away any built-up pollutants or debris, leaving everything looking fresh and green. Plus, if you’re lucky, you might even spot a rainbow once the rain stops – talk about a mood booster!

Of course, there are some downsides to all that rain. It can make it tough to plan outdoor activities, for one thing. And if you forget your umbrella or raincoat, you’re in for a soggy walk home. But hey, that’s what makes life interesting, right? There’s nothing quite like a sudden downpour and a bit of lightning and thunder to add a little excitement to your day.

So the next time you’re tempted to grumble about the rain, remember all the benefits that come with it. From helping our gardens grow to washing away winter’s grime, April showers may be a little inconvenient, but they’re definitely worth it in the end. And who knows – maybe they’ll even bring a smile to your face. Happy April, everyone!

Bird Feeders

There is some good news today, for those that have been told that feeding birds can be harmful to the bird themselves. I didn’t believe them in the first place, but now it’s said that …

Seeds and suet do more for birds than merely fill their bellies. Birds that are fed over the winter are healthier, because they do not have to spend as much energy fighting diseases.

Wild Leek Recipe

Here is a unique recipe using wild leeks! Here’s a recipe for a savory Wild Leek and Bacon Tart that combines the subtle, garlicky flavor of wild leeks with the rich, smoky flavor of bacon: They are getting harder to find these days, and if you do find them take only what you need, leaving the rest, so they will grow next year.

Ingredients:

  • 1 pie crust (homemade or store-bought)
  • 1 pound wild leeks, cleaned and chopped
  • 6 slices bacon, chopped
  • 1 cup heavy cream
  • 3 eggs
  • 1/2 cup grated Parmesan cheese
  • Salt and pepper, to taste

Instructions:

  1. Preheat the oven to 375 °F (190 °C).
  2. In a large skillet, cook the bacon over medium heat until crispy. Remove the bacon from the pan and set aside.
  3. Add the chopped wild leeks to the same skillet and cook for 5–7 minutes until they are wilted and tender.
  4. In a mixing bowl, whisk together the heavy cream, eggs, grated Parmesan cheese, salt, and pepper.
  5. Roll out the pie crust and place it in a 9-inch tart pan. Trim the edges of the crust and prick the bottom with a fork.
  6. Scatter the cooked bacon and wild leeks on the bottom of the tart crust.
  7. Pour the egg and cream mixture over the bacon and leeks.
  8. Bake for 35–40 minutes, until the filling is set, and the top is golden brown.
  9. Allow the tart to cool for a few minutes before serving.

This tart is a delicious and unique way to use wild leeks, and the combination of flavors is sure to impress! Enjoy!

Dandelion Recipes

Dandelions are a common plant that can be found almost anywhere, but did you know that they are also edible? Dandelions are not only a great source of nutrients, but also have a unique flavor that can be used in a variety of dishes. In this blog post, I will share some delicious recipes that you can make using fresh dandelions.

  1. Dandelion Salad

One of the simplest ways to use fresh dandelions is to make a salad. Start by washing and drying the dandelion leaves. Then mix them with your favorite salad ingredients like cucumbers, tomatoes, onions, and cheese. For the dressing, try mixing some olive oil, lemon juice, honey, and salt. Toss everything together and enjoy!

  1. Dandelion Pesto

If you’re a fan of pesto, you’ll love this dandelion version. In a food processor, blend together fresh dandelion leaves, garlic, pine nuts, Parmesan cheese, and olive oil. Use this pesto as a dip, spread on sandwiches, or mixed in with your favorite pasta.

  1. Dandelion Tea

Dandelion tea is a refreshing beverage that can be enjoyed hot or cold. To make dandelion tea, simply steep fresh dandelion flowers and leaves in hot water for 5–10 minutes. Strain and add honey or lemon if desired. This tea is great for detoxing and improving digestion.

  1. Dandelion Fritters

For a tasty appetizer, try making dandelion fritters. Mix together flour, salt, pepper, and water to create a batter. Dip fresh dandelion flowers in the batter and fry them in hot oil until golden brown. Serve with a dipping sauce of your choice.

  1. Dandelion Greens and Beans

This hearty dish is perfect for a healthy lunch or dinner. Start by sautéing garlic and onions in olive oil. Then add fresh dandelion greens and cook until wilted. Add some cooked white beans and cook until heated through. Season with salt, pepper, and red pepper flakes for a flavorful and filling meal.

  1. Dandelion Jelly

For a sweet treat, try making dandelion jelly. In a pot, boil dandelion flowers in water until the liquid turns yellow. Strain and measure the liquid, then add sugar and pectin according to the package instructions. Bring to a boil and pour into jars to cool. This jelly can be enjoyed on toast, biscuits, or scones.

In conclusion, dandelions are a versatile and tasty ingredient that can be used in many recipes. From salads to sweets, there are plenty of ways to incorporate fresh dandelions into your meals. So the next time you see these little yellow flowers, don’t just think of them as weeds – think of them as a delicious ingredient! ENJOY!

Black Fly Season Isn’t That Far Off

Black flies are a common pest in Northern Ontario, Canada, and their bites can be very irritating and itchy. While there are many insecticides and repellents available on the market, some people prefer to use natural remedies to deal with these pesky bugs. In this blog post, I will explore some natural remedies to deal with these pesky parasites.

  1. Wear protective clothing

One of the simplest ways to avoid black fly bites is to wear protective clothing. Cover up with long-sleeved shirts, pants, and socks. Choose light-colored clothing to make it easier to spot any black flies that land on you. You can also wear a hat with a wide brim to protect your face and neck.

  1. Use natural insect repellents

There are many natural insect repellents that can help keep black flies away. Essential oils such as citronella, eucalyptus, and lemongrass are effective at repelling insects. Mix a few drops of these oils with a carrier oil such as coconut or olive oil and apply it to your skin before heading outdoors. You can also use natural repellent sprays that contain these ingredients.

  1. Apply apple cider vinegar

Apple cider vinegar is a natural remedy that can help soothe black fly bites. Dab a small amount of undiluted apple cider vinegar onto the affected area to reduce itching and swelling. Repeat as necessary.

  1. Use aloe vera

Aloe vera is a soothing natural remedy that can help ease the discomfort of black fly bites. Cut open a fresh aloe vera leaf and apply the gel directly to the affected area. Alternatively, you can use aloe vera gel that has been extracted from the plant and stored in a container.

  1. Take a vitamin B supplement Which Helps Immensely

Taking a vitamin B supplement can help repel black flies. Vitamin B1, also known as thiamine, can be particularly effective at keeping these insects at bay. Take a daily supplement or eat foods rich in vitamin B, such as spinach, kale, and legumes.

  1. Avoid peak black fly hours

Black flies are most active during the early morning and late afternoon. Try to avoid being outside during these peak hours if possible. If you must be outdoors, consider wearing protective clothing and using natural repellents.

In conclusion, black flies can be a nuisance, but there are many natural remedies that can help you deal with them. By wearing protective clothing, using natural insect repellents, applying apple cider vinegar and aloe vera, taking a vitamin B supplement, and avoiding peak black fly hours, you can enjoy the outdoors in peace.

The Importance of Sunshine for Your Health in Northern Ontario, Canada

Living in Northern Ontario, Canada, can be an incredible experience. The vast wilderness, beautiful landscapes, and fresh air are just a few of the reasons why so many people choose to call this place home. However, with the long, cold winters and short days, it can also be challenging to get enough sunshine. This lack of sunshine can have a significant impact on your health and well-being. In this post, I will explore the importance of sunshine for your health and how you can ensure you’re getting enough of it, even in the depths of winter.

Why is Sunshine Important for Your Health?

Sunshine is crucial for your health because it’s the primary source of Vitamin D. This vitamin is essential for a range of bodily functions, including bone health, immune function, and mental health. Vitamin D deficiency has been linked to a host of health problems, including osteoporosis, depression, and even cancer.

But why is it so challenging to get enough sunshine in Northern Ontario? The answer lies in the tilt of the earth’s axis. During the winter months, the Northern Hemisphere is tilted away from the sun, which means that the sun’s rays hit the earth at a shallower angle. This results in fewer hours of daylight and weaker sunlight.

How to Get Enough Sunshine in Northern Ontario

Getting enough sunshine in Northern Ontario can be challenging, but it’s not impossible. Here are some tips to help you get the vitamin D you need, even in the depths of winter:

  1. Get outside during the day: Even if it’s cold, make sure you get outside during the day. The sun’s rays can still provide some vitamin D, even when it’s cloudy. Bundle up and take a walk, snowshoe, or ski. You’ll not only get some sunshine, but you’ll also get some exercise and fresh air.
  2. Eat foods rich in vitamin D: while sunshine is the best source of vitamin D, you can also get it from food. Fatty fish like salmon and tuna, egg yolks, and fortified milk and cereals are all good sources of vitamin D.

In Conclusion

Sunshine is critical for your health, and getting enough of it can be a challenge in Northern Ontario, Canada, or anywhere for that matter. However, by taking a few simple steps, you can ensure you’re getting the Vitamin D you need, even during the long, cold winter months. So, get outside, and eat foods rich in vitamin D. Your body will thank you.

It’s time to break out the lawn roller.

Rolling your lawn in the spring is an essential task that should not be overlooked if you want to have a healthy and lush lawn. Rolling can help to even out the surface of your lawn, which not only improves its appearance, but also has several other benefits. In this blog post, i’ll explore why rolling your lawn in the spring is so important and how you can do it effectively.

First off, rolling your lawn in the spring helps to level out any bumps and uneven spots that may have developed over the winter months. These bumps can be caused by several factors, including freezing and thawing, soil settling, and foot traffic. By rolling your lawn, you can smooth out these bumps and create a more even surface, which is not only looks nice, but also makes it easier to mow your lawn.

Secondly, rolling your lawn can help to improve soil compaction. Compacted soil can be a major problem for lawns, as it restricts the growth of grassroots and can lead to waterlogging and other issues. By rolling your lawn, you can help to break up compacted soil and create a looser, more aerated soil structure that promotes healthy grass growth.

Thirdly, rolling your lawn in the spring can also help to prepare your lawn for seeding. If you plan on over seeding your lawn in the spring, rolling can help to create a smooth surface for the new grass seed to take root. This can improve seed-to-soil contact, which is essential for successful germination and growth.

So, how do you roll your lawn effectively? The first step is to wait until the soil has dried out enough to support the weight of the roller without causing damage to the grass. Then, simply use a lawn roller filled with water or sand to roll over your lawn in a crisscross pattern, covering the entire surface. Avoid rolling over the same spot more than once, as this can lead to over compaction.

In conclusion, rolling your lawn in the spring is an important task that should not be ignored. By leveling out bumps, improving soil compaction, and preparing your lawn for seeding, rolling can help to promote healthy grass growth and improve the appearance of your lawn. So, grab your lawn roller and get to work – your lawn will thank you!

Broccoli

Here’s a blog post I put together about growing, planting broccoli and the health benefits it has.

Broccoli is a nutritious and versatile vegetable that is easy to grow and can provide a wealth of health benefits. With a little bit of knowledge and some simple gardening techniques, anyone can grow this nutritious plant in their own backyard. In this post, I will cover how to grow and plant broccoli, as well as some of the health benefits it can offer.

Growing Broccoli

Broccoli is a cool-season crop, which means it prefers to grow in temperatures between 60 and 65 degrees Fahrenheit. This makes it an ideal vegetable to grow in the spring and fall months. Which I will be doing a bit later on. Still too cold where we live. It is also a relatively low-maintenance plant, making it a great choice for beginner gardeners.

To start, select a sunny spot in your garden with well-drained soil. Broccoli prefers slightly acidic soil with a pH between 6.0 and 6.8. Prepare the soil by tilling it to a depth of at least six inches, and mix in some compost or aged manure to add nutrients.

Next, plant your broccoli seeds or seedlings about 18 to 24 inches apart, with rows spaced about two to three feet apart. Be sure to plant them at the same depth they were in their original containers. Water them regularly and keep the soil moist but not waterlogged.

As your broccoli grows, it will form a large central head surrounded by smaller side shoots. When the central head reaches a size of about four to six inches in diameter, it is ready to be harvested. Cut it off with a sharp knife, leaving at least an inch of stem attached to the plant. This will encourage the side shoots to develop.

Health Benefits of Broccoli

Broccoli is a nutritional powerhouse, packed with vitamins, minerals, and other beneficial compounds. Here are just a few of the health benefits it can offer:

  1. Nutrient-dense: Broccoli is a great source of vitamins C and K, as well as folate, potassium, and fiber.
  2. Antioxidant-rich: Broccoli contains a variety of antioxidants, including Sulforaphane, which has been shown to have anti-cancer properties.
  3. Anti-inflammatory: Broccoli contains compounds that can help reduce inflammation in the body, which is linked to a variety of chronic diseases.
  4. Immune-boosting: The vitamin C in broccoli can help support a healthy immune system.
  5. Heart-healthy: The fiber and potassium in broccoli can help lower blood pressure and reduce the risk of heart disease.

Conclusion

Broccoli is a delicious and nutritious vegetable that is easy to grow and can provide a wide range of health benefits. By following a few simple gardening techniques, anyone can grow this versatile plant in their own backyard. Whether you enjoy it steamed, roasted, or raw, incorporating broccoli into your diet can help support a healthy body and mind.

Raspberries

Today I would like to chat about growing, planting, and caring for different kinds of raspberries in Northern Ontario, Canada.

First off, it should be noted that Raspberries are a delicious and nutritious fruit that can be easily grown here in the north, or for that matter anywhere. Well … other than the desert. There are many different varieties of raspberries, but the two most common types are red raspberries and black raspberries. In this post, I will go through the process of growing, planting, and caring for both types of raspberries.

Red Raspberries

Red raspberries are the most common type of raspberry and are known for their sweet taste. They are typically grown on upright canes and produce fruit in the summer. Here are the steps to grow red raspberries in Northern Ontario:

  1. Choose a suitable location: Red raspberries require full sun and well-drained soil. Choose a location that receives at least 6 hours of direct sunlight per day.
  2. Prepare the soil: Loosen the soil to a depth of 12 inches and mix in organic matter like compost or well-rotted manure. This will help improve the soil’s fertility and drainage.
  3. Plant the raspberries: Dig a hole deep enough to accommodate the plant’s roots, and plant the raspberry cane at the same depth as it was in its container. Space the plants 2 to 3 feet apart in rows that are 6 feet apart.
  4. Water the raspberries: Water the raspberries thoroughly after planting and keep the soil moist but not waterlogged.
  5. Mulch the raspberries: Apply a layer of organic mulch like straw or wood chips around the base of the plants. This will help retain moisture in the soil and prevent weed growth.
  6. Prune the raspberries: In the first year, prune the raspberry canes back to about 6 inches above the ground. In subsequent years, prune the canes that have produced fruit and leave the new canes that will produce fruit the following year.
  7. Fertilize the raspberries: Apply a balanced fertilizer in the spring and mid-summer to help promote healthy growth and fruit production. I prefer Natural Fertilizers such as cow manure. If you have to buy a commercial brand, make sure all the numbers are the same. An example would be 10-10-10.

Black Raspberries

Black raspberries are less common than red raspberries but are known for their unique flavor. They are typically grown on trailing canes and produce fruit in the early summer. Here are the steps to grow black raspberries in Northern Ontario:

  1. Choose a suitable location: Black raspberries require full sun and well-drained soil. Choose a location that receives at least 6 hours of direct sunlight per day.
  2. Prepare the soil: Loosen the soil to a depth of 12 inches and mix in organic matter like compost or well-rotted manure. This will help improve the soil’s fertility and drainage.
  3. Plant the raspberries: Dig a hole deep enough to accommodate the plant’s roots, and plant the raspberry cane at the same depth as it was in its container. Space the plants 3 to 4 feet apart in rows that are 8 feet apart.
  4. Water the raspberries: Water the raspberries thoroughly after planting and keep the soil moist but not waterlogged.
  5. Mulch the raspberries: Apply a layer of organic mulch like straw or wood chips around the base of the plants. This will help retain moisture in the soil and prevent weed growth.
  6. Train the raspberries: Black raspberries are trailing plants and require support. Install a trellis or support system to keep the canes off the ground.
  7. Prune the raspberries: In the first year, prune the raspberry canes back to about 6 inches above the ground. In subsequent years, prune the canes that have produced fruit and leave the new canes that will produce fruit the following year.
  8. I hope this might be of some help, and have a great day!

Growing Strawberries

In this blog post, I will discuss the steps you can take to successfully grow strawberries in Northern Ontario, Canada.

Choosing the Right Variety

The first step in planting strawberries in Northern Ontario is to choose the right variety. Some strawberry varieties are better suited for colder climates, while others may struggle to grow in the region. Here are some varieties that are well-suited for Northern Ontario:

  1. Honeoye: This variety is known for its early-season production, and it is well-suited for colder climates.
  2. Jewel: This variety is a mid-season producer that is also well-suited for colder climates.
  3. Allstar: This variety is a late-season producer that is known for its large fruit size.

Preparing the Soil

Once you have chosen the right variety, it’s time to prepare the soil. Strawberries prefer well-draining soil that is rich in organic matter. In Northern Ontario, the soil may be heavy and clay-like, so you may need to amend it with organic matter such as compost or aged manure.

It’s also important to ensure that the soil has a pH level between 5.5 and 6.5. You can test the pH level of your soil with a soil testing kit, which can be purchased at a local garden center or online.

Planting the Strawberries

Now that your soil is prepared, it’s time to plant the strawberries. You can plant strawberries in the spring, as soon as the ground has thawed and the soil temperature has reached 45°F.

Here are the steps to planting strawberries:

  1. Create a planting hole that is wide enough to accommodate the plant’s roots.
  2. Set the strawberry plant in the hole, making sure the crown is level with the soil surface.
  3. Fill the hole with soil, being careful not to bury the crown of the plant.
  4. Water the plant thoroughly to help settle the soil around the roots.
  5. Space the plants about 12–18 inches apart, with rows spaced 2–3 feet apart.

Caring for the Strawberries

Once your strawberries are planted, it’s important to care for them properly to ensure a healthy and productive crop. Here are some tips for caring for your strawberries:

  1. Water the plants regularly, especially during dry periods. Strawberries require about 1–2 inches of water per week.
  2. Mulch the plants with straw or other organic material to help retain moisture and suppress weeds.
  3. Fertilize the plants with a balanced fertilizer, such as a 10-10-10 formula, in early spring and again in early summer.
  4. Protect the plants from frost in the spring by covering them with blankets or tarps.
  5. Control pests and diseases by monitoring the plants regularly and taking action at the first sign of a problem.

Harvesting the Strawberries

After caring for your strawberries for several months, it’s time to harvest the fruit. In Northern Ontario, strawberries are typically ready for harvest in late June or early July.

Here are some tips for harvesting strawberries:

  1. Pick the fruit when it is fully ripe and red in color.
  2. Use a sharp knife or scissors to cut the fruit from the stem, being careful not to damage the plant.
  3. Harvest the fruit regularly to prevent over-ripening and spoilage.

I hope this gets you motivated enough so that you plant a few this spring. I know I am. Have a great day. GW

A Bit on Harvesting your Winter Garlic

Garlic is a wonderful addition to any dish, and growing your own winter garlic can be a rewarding experience. Winter garlic is planted in the fall and harvested in the spring, making it a great crop for cold weather climates. Here are some tips for harvesting your winter garlic:

  1. Timing: Harvesting your garlic at the right time is crucial to getting the best flavor and shelf life. The bulbs should be mature, and the leaves should be brown and dying back. This typically happens in late spring or early summer, depending on your location and the weather.
  2. Preparing the soil: Garlic grows best in well-drained soil that has been enriched with compost or other organic matter. Make sure to remove any weeds or other debris from the soil before planting your garlic, and consider adding a layer of mulch to help retain moisture.
  3. Planting: Plant your garlic cloves about six inches apart and two inches deep in the soil. Make sure to cover the cloves with soil and water them thoroughly. Garlic requires a lot of water during its growth, so make sure to keep the soil moist.
  4. Harvesting: When the leaves of your garlic plants have turned brown and the bulbs have matured, it is time to harvest them. Use a garden fork or shovel to loosen the soil around the bulbs, then gently pull them out of the ground. Be careful not to damage the bulbs or the roots.
  5. Curing: After harvesting, it is important to let your garlic cure for several weeks. This allows the bulbs to dry out and develop a papery outer layer that will protect them during storage. Hang the garlic in a warm, dry place with good air circulation, such as a garage or shed.
  6. Storing: Once your garlic has cured, it is ready to be stored. Remove any loose dirt or debris from the bulbs, but do not wash them. Store your garlic in a cool, dry place with good ventilation, such as a pantry or basement. Do not store garlic in the refrigerator, as this can cause the bulbs to sprout.

Harvesting your winter garlic can be a lot of fun and a rewarding experience, and it can provide you with fresh, flavorful garlic to use in your cooking throughout the year. By following these tips, you can ensure a successful garlic harvest and enjoy the fruits of your labor.

I can’t wait till mine is ready to dig. Nothing like fresh Garlic.

A Bit on Chaga

Chaga is a medicinal mushroom that has been used for centuries in traditional medicine. It is known for its potential health benefits, which include boosting the immune system, reducing inflammation, and fighting cancer cells. In this blog post, we will discuss how to use chaga and how to harvest it.

What is Chaga? Well, I’ll tell ya.

Chaga, is a type of mushroom that grows on the bark of birch trees. It has a dark, hard, and crusty exterior, and a soft, orange-brown interior. Chaga is rich in antioxidants, including polysaccharides and phenolic compounds, which may contribute to its potential health benefits.

Using Chaga

Chaga can be consumed in various forms, including as a tea, powder, or tincture. Here are some ways to use chaga:

Chaga Tea: To make chaga tea, you will need to first harvest the chaga. Then, you can break the chaga into small pieces and steep them in hot water for at least 30 minutes. You can also add other herbs or spices, such as cinnamon or ginger, to enhance the flavor.

Chaga Powder: Chaga powder can be used to add a nutritional boost to smoothies, oatmeal, or baked goods. You can either purchase chaga powder or make your own by grinding dried chaga in a coffee grinder.

Chaga Tincture: A tincture is a concentrated liquid extract made from herbs or mushrooms. To make a chaga tincture, you will need to soak chopped chaga in a high-proof alcohol, such as vodka or rum, for several weeks. The alcohol extracts the beneficial compounds from the chaga, creating a potent tincture.

Harvesting Chaga

If you want to harvest chaga, there are a few things you should keep in mind. First, it is important to only harvest chaga from living birch trees, as dead or dying trees can contain harmful bacteria and fungi. Second, you should only take a small piece of chaga from each tree to avoid damaging the tree and to allow the chaga to regenerate.

Here are the steps to harvest chaga:

  1. Look for a birch tree with a chaga growth. The chaga will be a dark, hard, and crusty growth on the bark of the tree.
  2. Use a sharp knife or chisel to carefully remove the chaga. Make sure to leave a small piece of chaga on the tree to allow for regeneration.
  3. Clean the chaga by scraping off any dirt or debris. You can also rinse it with water and pat it dry.
  4. Store the chaga in a dry, cool place, away from sunlight.

Conclusion

Chaga is a potent medicinal mushroom that can be consumed in various forms, including as a tea, powder, or tincture. If you want to harvest chaga, make sure to only take a small piece from living birch trees and to leave a piece of chaga on the tree to allow for regeneration. With proper harvesting and preparation, chaga can be a valuable addition to your health regimen.