Category Archives: Gardening

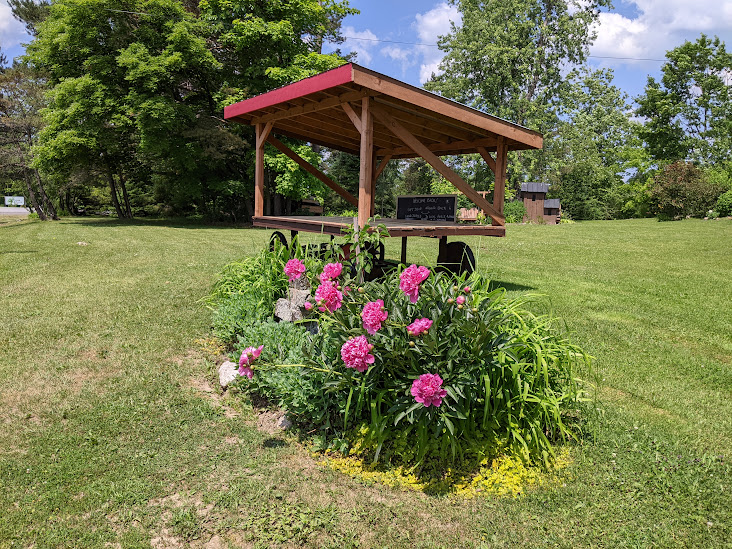
Spot for you to do some reading on gardening and staying healthy. Also a great place to put your feet up and relax for a bit.

Garlic 2023

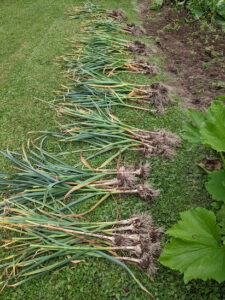
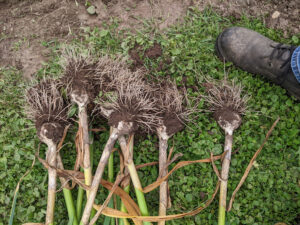
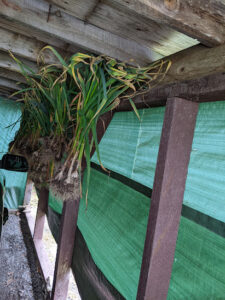
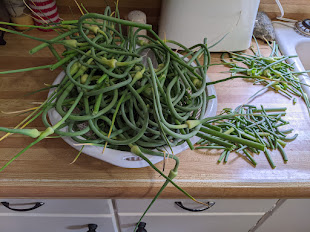
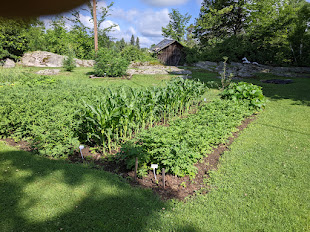
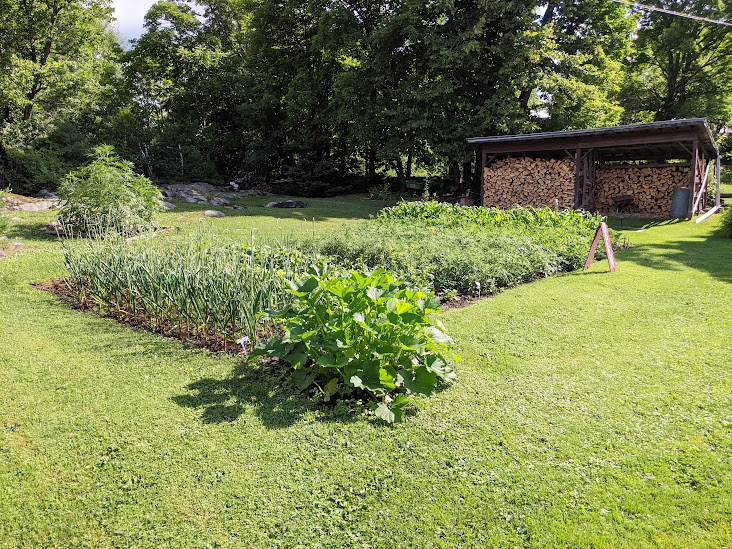
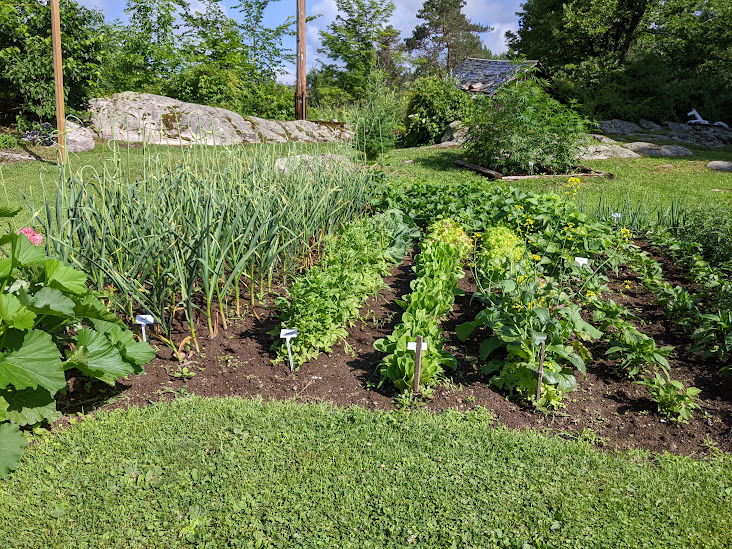
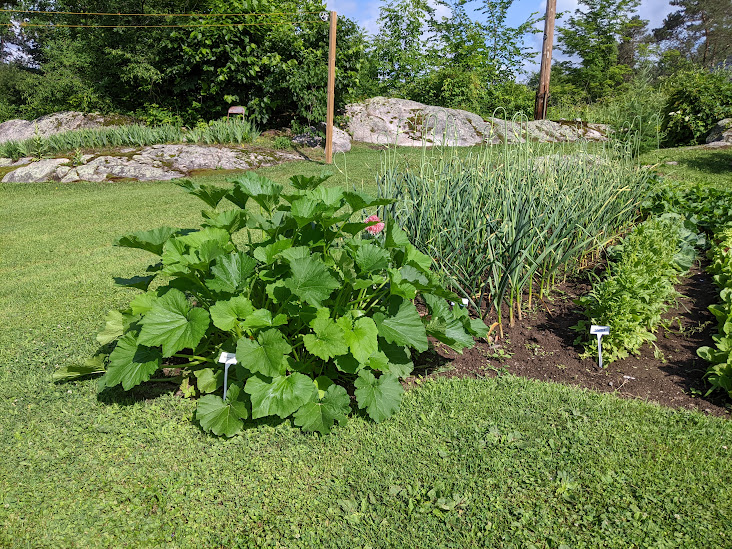
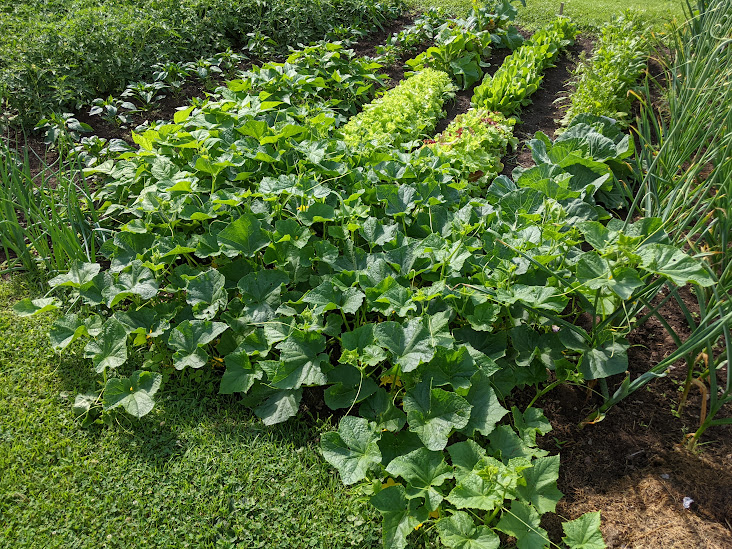
Our GARLIC is looking good this year. It won’t be long before we will be eating the Scapes. And later on in the summer I will dig the bulbs for winter eating. They sure are tasty, especially in my lovely wife’s spaghetti.

Click on image to enlarge!

Fertilizing your veggie garden naturally

Here’s a blog post for you about fertilizing your vegetable garden with natural ingredients the old way, written from a farmer’s perspective and with a bit of humour. Enjoy!


Today, I want to talk to y’all about fertilizing your vegetable garden with natural ingredients the old way. As someone who’s been tending to crops for as long as I can remember, I can tell you that the best way to nourish your veggies is by going back to basics and using ingredients that Mother Nature intended. And trust me, it’s a heck of a lot more fun than buying a bunch of fancy, chemical-laden fertilizers.

So, what exactly are these natural ingredients, you ask? Well, let me tell you. First up, we’ve got good old-fashioned manure. Yes, I know it’s not the most glamorous thing in the world, but hear me out. Cow, horse, chicken, or even rabbit manure can work wonders for your soil. Not only does it provide a good source of nitrogen, but it also helps with water retention and soil structure. Just make sure you let it age for a bit before using it, otherwise you’ll be in for a real stinky surprise.

Next up, we’ve got compost. Now, this may not be the most exciting ingredient either, but it’s definitely one of the most effective. Compost is basically decayed organic matter, like leaves, grass clippings, and kitchen scraps. When added to your soil, it helps to improve its texture, adds beneficial microorganisms, and provides a slow-release source of nutrients. Plus, it’s a great way to reduce waste and make use of things you would have otherwise thrown away.

If you’re looking to add some specific nutrients to your soil, there are plenty of other natural options out there. For example, if you need more phosphorus, bone meal or rock phosphate can do the trick. If you need more potassium, wood ash or kelp meal are good options. And if you need more calcium, you can try adding some crushed eggshells.

Now, I know what some of you may be thinking. “But George, isn’t using natural fertilizers more work than just buying something from the store?” Well, yeah, it might take a little more effort on your part. But think about it this way: when you use natural fertilizers, you’re not just nourishing your plants, you’re also nourishing the soil. And healthy soil means healthy plants, which means healthier and tastier veggies for you to enjoy. Plus, you’ll be doing your part to reduce chemical runoff and promote sustainable agriculture.

So there you have it, folks. Fertilizing your vegetable garden with natural ingredients may not be the flashiest option out there, but it’s definitely one of the most effective. And who knows, you might even find yourself enjoying the process. Just don’t forget to wash your hands afterwards!

Until next time. GW

Asparagus

Howdy there, folks! Today, we’re gonna talk about one of my favourite veggies to grow in the garden: Asparagus. Now, if you’re lookin’ for a plant that’ll give you some good eatin’ year after year, asparagus is the way to go. It’s a mighty fine addition to any country boy’s or gal’s garden, and it sure does taste mighty fine on the dinner table too. So let’s dig in and learn all about harvestin’, growin’, and usin’ this green delight!

First things first, let’s talk about when to harvest that asparagus. Now, when it comes to this here plant, patience is key. You see, asparagus takes a bit of time to establish itself and build up its root system before you start pickin’ those spears. Typically, you wanna wait about two to three years after plantin’ before you start harvestin’. I reckon that might sound like a long time, but let me tell ya, it’s well worth the wait!

When it finally comes time to harvest, you wanna keep an eye out for them spears shootin’ up from the ground. You’ll notice ’em poppin’ up in the springtime, usually around April or May, dependin’ on where you’re located. Look for spears that are about 6 to 8 inches tall and have tight, closed tips. Now, here’s a little trick: when you’re cuttin’ them spears, make sure to use a sharp knife or pair of shears and cut ’em right at ground level. Be careful not to damage any of the other spears that are comin’ up nearby.

Alright, now let’s get into the nitty-gritty of growin’ asparagus. When it comes to plantin’, you wanna find a nice sunny spot in your garden with well-drained soil. Asparagus likes its space, so give ’em a good 18 inches to 2 feet between each plant. Diggin’ a trench about 8 inches deep and a foot wide should do the trick. Now, mix in some good ol’ compost or manure with that soil to give your asparagus some nourishment.

Next up, lay them crowns (that’s what we call the root system) in the trench, spreadin’ out the roots real nice-like. Cover ’em up with about 2 inches of soil, but don’t fill the trench entirely just yet. As them spears start growin’, keep addin’ soil gradually until you reach ground level. That’ll help protect the crowns and encourage healthy growth. And remember, asparagus likes a good drink of water, so make sure to keep ’em hydrated, especially during dry spells.

Now, let’s move on to the fun part: Usin’ that homegrown asparagus in the kitchen! Once you’ve harvested your spears, you wanna make sure to use ’em up fresh for the best taste. Asparagus is mighty versatile, so you can cook it up in a variety of ways. One popular method is to steam ’em until they’re tender but still have a little crunch. Then, you can enjoy ’em plain, with a little butter, or even wrapped in bacon for some extra country goodness.

If you’re feelin’ a bit adventurous, you can also roast or grill those spears. Just drizzle ’em with some olive oil, sprinkle a pinch of salt and pepper, and let ’em sizzle away on the grill or in the oven. Asparagus also plays real nice with other ingredients, like lemon juice, garlic, Parmesan cheese, or even in a good ol’ country-style stir-fry.

So there you have it, folks! That’s the best I can do using my country boy lingo. Have a great day! GW

Probiotics From Veggies

Click on image to enlarge!

Today, I would like to talk about how fresh vegetables can give you the probiotics you need for a healthy stomach and mind. Seems, though, I have been talking about a lot of things today. Anyway … as we get older, it’s important to take care of ourselves and our digestive systems, and one way to do that is through probiotics.

Now, what are probiotics, you might ask? Well, they’re the good bacteria that live in our gut and help keep our digestive system working properly. They can be found naturally in some foods like yogurt and kefir, but did you know that fresh vegetables can also be a great source of probiotics?

That’s right! Vegetables like sauerkraut, kimchi, and pickles are all fermented foods that are rich in probiotics. Fermentation is a process where the natural bacteria in the food are allowed to grow and multiply, creating a natural source of probiotics.

Not only do probiotics help keep our gut healthy, but they can also have a positive effect on our mental health, especially as we age. Recent studies have shown that a healthy gut microbiome can help reduce the risk of depression, anxiety, and cognitive decline in older adults.

So, how can a person incorporate these probiotic-rich veggies into your diet? Well, it’s simple! You can try making your own fermented veggies at home, or you can purchase them from a local farmer’s market or grocery store.

Here’s a simple recipe for making your own sauerkraut that my wife and I have used for years.

Ingredients:

  • 1 head of cabbage
  • 1-2 tablespoon of sea salt
  • 1 tablespoon of caraway seeds (optional)

Instructions:

  1. Shred the cabbage and place it in a large bowl.
  2. Add the sea salt and caraway seeds (if using) and mix well.
  3. Pack the cabbage tightly into a jar or crock, making sure there is no airspace.
  4. Cover the jar with a lid or cloth and let it sit at room temperature for 3–7 days, depending on how sour you like your sauerkraut.
  5. Once it’s ready, store the sauerkraut in the fridge and enjoy!
  6. I will see if I can do up a more detailed way of making it another day.

So there l have it, folks! Fresh vegetables can be a great source of probiotics, and they can help keep our stomach and mind healthy as we age. So the next time you’re at the farmer’s market, be sure to pick up some sauerkraut, kimchi, or pickles to add to your diet. Or better yet grow and make your own!!

Tomatoes & Why You Should Grow Them

  • Let me tell ya folks, there ain’t nothin’ quite like a fresh, juicy tomato straight off the vine. Not only do they taste mighty fine, but they’re also chock-full of vitamins and nutrients that are good for your gut and overall well-being.

Now, some folks might say they don’t have the green thumb for growin’ their own tomatoes, but let me tell ya, it’s easier than you might think. All you need is some good soil, a bit of sunshine, and a little bit of TLC. Plus, growin’ your own tomatoes gives ya the peace of mind of knowin’ exactly where your food comes from and what’s been put into it.

And let me tell ya, there’s just somethin’ about the taste of a homegrown tomato that can’t be beat. Nothin’ store-bought can compare to that sweet, tangy flavor that comes from pickin’ ’em ripe off the vine. Plus, growin’ your own tomatoes can save ya some serious cash in the long run. Ain’t no need to be spendin’ a pretty penny on those fancy, organic tomatoes when ya can grow ’em yourself for a fraction of the cost.

So, what are ya waitin’ for? Get yourself a little patch of dirt, some tomato seeds, and get to growin’! Your stomach and your wallet will thank ya for it.

Making your Meals taste just that much better? Add Mushrooms

As a farmer, I know firsthand the importance of eating nutritious meals. One simple and delicious way to boost the nutritional value of your meals is by adding mushrooms. Not only are they a great source of protein and fiber, but they are also packed with vitamins and minerals.

If you’re looking for the best kinds of mushrooms to buy in Canada, here are my top recommendations:

  1. Shiitake mushrooms – These mushrooms have a rich, meaty flavor and are a good source of B vitamins, as well as minerals like copper and selenium.
  2. Oyster mushrooms – These mushrooms have a delicate, sweet flavor and are rich in antioxidants.
  3. Portabello mushrooms – These meaty mushrooms are high in potassium and are a good source of vitamin D.

When you add mushrooms to your meals, you’re not only making them more nutritious, but also more flavorful. So the next time you’re at the grocery store, be sure to pick up some of these delicious and nutritious mushrooms. Your body will thank you!

Peonies, The Plant That Keeps On Giving

Click on image to enlarge!

Hey there, folks! My lovely wife has always said that – peonies are a fantastic addition to any garden or landscape. So knowing that, here are some tips on how to plant them and where to plant them.

First, let’s talk about how to plant peonies. These beauties are fairly easy to grow, but they do require some specific conditions in order to thrive. Here are the steps to planting peonies:

  1. Choose a planting site that receives at least 6 hours of full sun per day. Peonies need plenty of sunlight in order to produce those big, beautiful blooms.
  2. Prepare the soil. Peonies prefer well-draining soil that is rich in organic matter. If your soil is heavy clay, consider amending it with compost or other organic matter to improve drainage.
  3. Plant the peony tuber. Dig a hole that is deep enough to accommodate the entire tuber, with the eyes facing upwards. Cover the tuber with 1-2 inches of soil, making sure not to bury it too deep.
  4. Water the peony well. After planting, give the peony a good soaking to help settle the soil and encourage root growth.
  5. Mulch around the base of the plant. A layer of organic mulch, such as shredded leaves or bark, will help to retain moisture and suppress weeds.

Now, let’s talk about where to plant peonies. Peonies are incredibly versatile and can be planted in a variety of locations in your yard or garden. Here are a few ideas:

  1. In a border. Peonies make a great addition to any flower border. Plant them in groups of 3-5 for a stunning display.
  2. In a mixed perennial bed. Peonies look great when planted alongside other perennials, such as day lilies, coneflowers, or phlox.
  3. In a container. If you don’t have a lot of space in your yard, you can still enjoy peonies by planting them in a large container.
  4. As a cut flower. Peonies make excellent cut flowers and are a popular choice for weddings and other special occasions.

So there you have it – some tips on how to plant and where to plant peonies. I hope you’ll give these gorgeous flowers a try in your own garden – I have no doubt that you’ll be pleased with the results!

It’s almost time to plant your Potatoes here in the North

Today, I would like to talk about planting your own potatoes, which is a mighty fine idea for several reasons. Firstly, it gives you full control over the quality of the spuds you’re putting on your plate. You can ensure that they’re free from nasty chemicals and pesticides, and you can pick the best variety for keeping over the winter months.

Now, speaking of varieties, if you’re looking for a potato that’s going to last through the winter, you’ll want to go for a high-starch variety like a Russet or a Yukon Gold. These potatoes have a nice firm flesh that’ll hold up to storage, even in the colder temperatures.

When it comes to planting, you’ll want to get started in the early spring, as soon as the soil has warmed up a bit around 50F. You’ll need to make sure your soil is in good shape, so give it a good working over with some organic matter like compost or well-rotted manure. Cut your seed potatoes into chunks, making sure that each piece has a good sprout or two, and plant them about 4 inches deep and 12 inches apart in rows that are about 3 feet apart.

Now, as your potato plants grow, you’ll need to keep an eye on them and make sure they’re getting enough water. You’ll also want to “hill” them, which means mounding soil up around the stems. This will help to keep the developing spuds covered and protected.

When it comes to storage, you’ll want to cure your potatoes for a week or two after harvest by leaving them in a warm, dry place with good ventilation. After curing, store your potatoes in a cool, dark place with good air circulation. A root cellar is ideal, but a cool garage or basement will work too.

Remember, growing potatoes does take some work and attention to detail, but it’s well worth the effort. There’s nothing quite like the taste of fresh, home-grown potatoes on your plate, especially when it’s cold and miserable outside. I am going to pick up my seed potatoes next week.

Food For Your Immune System

As a farmer, I have seen firsthand how growing your own fruits and vegetables can not only save you money, but also help boost your immune system. And let’s be honest, a healthy immune system is more important than ever these days. So, in this blog post, I’ll share some of the best vegetables, fruits, and tomatoes to grow and eat for your immune system.

  1. Kale – Ah, kale. The vegetable that people either love or love to hate. But as a farmer, I can tell you that this leafy green is a powerhouse when it comes to nutrients. It’s packed with vitamins A, C, and K, as well as antioxidants that can help support your immune system. Plus, if you grow it yourself, you can feel extra smug about your healthy choices.
  2. Garlic – Sure, it might make your breath smell like you’ve been eating ….. for dinner, but garlic is an immune-boosting superstar. It contains compounds that have antibacterial and antiviral properties, making it a great addition to any dish. And hey, if people don’t want to hang out with you because of your garlic breath …. at least you’ll be healthy.
  3. Tomatoes – Technically a fruit, but let’s not split hairs. Tomatoes are loaded with vitamin C, which is essential for a healthy immune system. Plus, they’re delicious and versatile. You can eat them raw in a salad, roast them for a delicious sauce, or slice them up and put them on a sandwich. And if you grow your own, you can enjoy the smug satisfaction of knowing that you’re a master gardener.
  4. Berries – Blueberries, strawberries, raspberries…they’re all good for you. Berries are packed with antioxidants that can help protect your cells from damage. Plus, they’re sweet and delicious. Who said being healthy had to be boring?
  5. Sweet potatoes – Sweet potatoes are a root vegetable that are loaded with beta-carotene, which is converted to vitamin A in the body. Vitamin A is important for a healthy immune system, so sweet potatoes are a great choice. Plus, they’re delicious and versatile. You can roast them, mash them, or even use them to make fries.

In conclusion, I can tell you that growing your own fruits and vegetables is a great way to support your immune system. So if you have the room, why not, grow your own food, and bask in the glow of your own awesomeness. If not, take a trip to your farmers market, the farmers will be glad you did, along with your body of course!

The Dandelion

I have written many articles about the Dandelion over the years. Here is one more. Why? Well, let’s just say … Just Because I Can. Ha ha.

You may have seen dandelions growing in your yard or in nearby fields, and you might have thought of them as a pesky weed. But did you know that dandelions are one of the most beneficial plants on earth? In fact, they have a long history of medicinal use and are packed with essential nutrients. In this post, we’ll explore the importance of dandelions, what you can use them for, and how to avoid killing them.
First, let’s talk about the importance of dandelions. Dandelions are a vital source of food for pollinators such as bees and butterflies. They also have deep taproots that help to break up hard soil and bring nutrients up from deep in the ground. This makes them an important part of any ecosystem.

Second, let’s explore what you can use dandelions for. The leaves, flowers, and roots of the dandelion plant are all edible and have a variety of health benefits. Dandelion leaves are high in vitamins A, C, and K, as well as calcium, iron, and potassium. They can be eaten raw in salads or cooked like spinach. Dandelion flowers can be used to make tea or wine, and the roots can be roasted and brewed as a coffee substitute. Dandelion root tea is also used as a natural remedy for a variety of ailments, including digestive issues, liver problems, many types of cancer and inflammation.

Now, let’s talk about how to avoid killing dandelions. Many people view dandelions as a nuisance and try to get rid of them by using herbicides or pulling them up by the roots. However, this can harm the environment and disrupt the ecosystem. Instead, consider leaving dandelions alone or harvesting them for food or medicine. If you do need to remove them, try to do so by hand rather than using chemicals.

Finally, let’s discuss how dandelions can benefit your vegetable garden. Dandelions are a natural fertilizer, as their deep taproots bring up nutrients from deep in the soil and deposit them on the surface. They also attract pollinators to your garden, which can help your vegetables grow. Plus, dandelion leaves can be added to your compost pile to enrich the soil.

In conclusion, dandelions are much more than just a weed. They are an important part of the ecosystem, a source of food and medicine, and a natural fertilizer for your garden. So, the next time you see a dandelion in your yard or nearby field, consider harvesting it instead of destroying it. You might be surprised at how delicious and beneficial it can be!

Hmm, I think I will head on out and pick a few to mix in with our salad tonight for supper. Have a great day.

It’s That Time of Year, Wild Leek Season

Click On Image To Enlarge!

Wild leeks, also known as ramps, are a tasty and nutritious plant that grows wild in certain regions of North America. They have a distinct flavor that’s a cross between onion and garlic, and they can be used in a variety of recipes, from soups and stews to salads and sandwiches. However, it’s important to harvest ramps responsibly, so that they continue to grow and thrive in their natural habitat.

So, where can you find wild leeks? They typically grow in wooded areas, especially in damp or moist soil. Look for them in the early spring, usually in late March or early April, when the weather starts to warm up. Here in the north where we live they are just starting now. You may also be able to spot them by their broad, flat leaves and their white bulbs, which are typically buried just below the surface of the soil.
Once you’ve found a patch of wild leeks, it’s important to harvest them carefully, so that you don’t damage the plant or the surrounding environment. To do this, use a small digging tool, such as a garden trowel, to gently loosen the soil around the base of the plant. Then, use your hands to carefully pull the plant out of the ground, making sure to leave the bulb and some of the roots intact.

It’s also important to only take a few ramps from each patch, and to spread out your harvesting so that you’re not taking all the plants from one area. This will allow the plants to regenerate and continue to grow year after year.

Once you’ve harvested your ramps, it’s time to cook them up! Wild leeks can be used in a variety of recipes, from soups and stews to quiches and frittatas. To prepare them, simply clean them thoroughly and remove any dirt or debris. You can then chop them up and use them in your favorite recipes.

One classic way to prepare wild leeks is to sauté them in butter and olive oil, along with some salt and pepper. This will bring out their natural flavor and make them tender and delicious. You can also add them to soups and stews, or use them as a topping for pizza or pasta.

Overall, wild leeks are a delicious and nutritious plant that can add flavor and variety to your meals. However, it’s important to harvest them responsibly, so that they continue to grow and thrive in their natural habitat. So, remember to only take a few ramps from each patch, and to spread out your harvesting so that you’re not taking all the plants from one area. And, most importantly, keep the location of your ramp patches to yourself, or with those that you know who won’t take more than they need. In doing so, they can continue to grow and thrive for years to come.

Bumble Bees & Their Importance

Here is a picture of a bumblebee busy at work on one of our Sedum plants. Click on image to enlarge!

There is one bee around hour home that we have a lot of, and my lovely wife and I sure do enjoy watching them working away in our gardens. What would it be?

I’m talkin’ ’bout them bumblebees. You might have seen ’em buzzin’ around your garden or takin’ a sip from some flowers. Bumblebees are them big, fuzzy bees that look like they can barely fly, but they sure can! They got a real important job to do, pollinatin’ our crops and makin’ sure we can have fresh veggies on our plates.

Now, these bumblebees ain’t picky about where they live, you might find them nestin’ in a hole in the ground, or maybe in an old mouse nest. They like to be in a quiet spot, away from all the noise us humans make. They also got a real sweet tooth for flowers, especially the Sedum plant, which we have lots of on our property. That plant’s got tiny little flowers all bunched up, and bumblebees just love to get in there and sip on the nectar.

If you want to help these little critters out, you can make ’em a home! All you need is a wooden box or an old birdhouse, and fill it with some soft materials like moss or dry grass. Make sure there’s a small hole for them to get in and out of, and put it in a quiet spot in your yard. They will thank ya for it by pollinatin’ your garden even more.

And don’t worry ’bout botherin’ these little guys. They ain’t going to sting ya, unless they feel threatened, and they usually keep to themselves. Just give ’em their space, and they’ll go on doin’ their important work, pollinatin’ our crops. So next time ya see a bumblebee buzzin’ ’round, give ’em a little wave and thank ’em for all they do for us!

Crows

Over the years, living where we do, my lovely wife and I have had a pair of crows that comes back every spring, and stays with us all summer long. They also raise their family, which is two, but occasionally they have three. We enjoy watching them. We also feed them any scraps we have and there isn’t a morning that goes by that they aren’t waiting for us waiting for their morning treat.

It should also be noted that Crows are some of the smartest birds out there, and they have some pretty impressive memory skills. They not only remember where they stash their food, but they can also tell which food is the freshest. Let me break it down for you.

Foremost, crows have incredible memories. They can remember individual human faces, and they can remember the locations of hundreds of food caches. They use landmarks to help them remember where they’ve stashed their food, and they can even remember the time of year when they buried it. That’s pretty impressive for a bird, ain’t it?

Now, when it comes to figuring out which food is the freshest, crows use their sense of smell. They can detect the odors of different foods and tell which ones are more pungent, indicating that they’re fresher. Crows also have a hierarchy of food preferences, so they’ll prioritize the freshest and tastiest food when deciding which cache to raid.

Now, you might be wondering, “How does this help us humans?” Well, crows are actually pretty helpful little critters. They’re known for eating insects and rodents that can damage crops, so they can help farmers protect their crops from pests. And, believe it or not, some people even use crows to help them hunt! They’ll follow crows to see where they’re caching their food, and then they’ll set up a trap in that area to catch other animals that might be attracted to the food.

So there you have it. Crows are some pretty smart birds, and they can remember where they stash their food and tell which food is the freshest. They also help us humans by eating pests and even assisting in hunting. Who knew these little black birds could be so darn helpful?

Living On a Shoestring

Living on a shoestring is all about making every penny count. It can be tough, but with some good old-fashioned skimping you can make it work. As a country boy, I know a thing or two about living simply, and I’m happy to share some tips on how my lovely wife and I got by when times were tough.

  1. Cook from scratch

Eating out can be expensive, and buying pre-packaged meals can add up quickly. Instead, learn to cook from scratch. Buy basic ingredients like rice, beans, and pasta, and learn to make meals from them Not only is it cheaper, but it’s also healthier and often tastes better than pre-packaged food.

  1. Shop at thrift stores

Buying brand-new clothes can be expensive, but shopping at thrift stores can save you a bundle. You can find gently used clothes for a fraction of the cost of new ones. Plus, you might even stumble upon some hidden gems.

  1. Learn to mend and repair

Instead of throwing away clothes or household items that are broken, learn to mend and repair them. Sewing on a button or patching a hole can save you from having to buy new items. It’s also a useful skill to have for the future.

  1. Use coupons and discounts

Don’t be too proud to use coupons and discounts. They can save you a lot of money, especially on groceries and household items. Keep an eye out for deals and sales, and always compare prices before making a purchase.

  1. Cut back on unnecessary expenses

Take a look at your monthly expenses and see where you can cut back. Cancel subscriptions that you don’t use, switch to a cheaper phone plan, and reduce your energy usage. Small changes can add up to big savings over time.

  1. Grow your own food

If you have the space, consider growing your own fruits and vegetables. You don’t need a big garden to get started – even a few potted plants can provide you with fresh produce. Not only is it cheaper, but it’s also a fun and rewarding hobby.

  1. Make your own cleaning products

Instead of buying expensive cleaning products, make your own using simple ingredients like vinegar, baking soda, and lemon juice. Not only is it cheaper, but it’s also more environmentally friendly.

  1. Learn to enjoy simple pleasures

Living on a shoestring doesn’t mean you have to give up on fun and enjoyment. Learn to appreciate simple pleasures like reading a book, taking a walk in nature, or having a picnic. These activities are often free or low-cost, but can provide just as much joy as more expensive pursuits.

In conclusion, living on a shoestring is all about being resourceful, frugal, and creative. It can be tough, but with some effort and scrimping, and determination, you can make it work. By cooking from scratch, shopping at thrift stores, learning to mend and repair, fixing your own equipment, using coupons and discounts, cutting back on unnecessary expenses, growing your own food, making your own cleaning products, and learning to enjoy simple pleasures, you can stretch your dollars further and make the most of what you have.

Have a great day. GW

Why We Should Return to Doing up Preserves

Here are just a few of what my wife does up every summer.

Click on image to enlarge!

I had an email the other day asking me if I had any way of easing the grocery bill a bit. Well, here is what I came up with.

Back in the day, folks like my lovely wife and I relied on preserving our own food to get through the long winter months. My wife would pickle, can, and ferment fruits and vegetables, so we could enjoy them all year round. And let me tell you, it saved us a lot of money. But not only is preserving your own food a great way to save money, it’s also good for your health.

Because when you make your own preserves, you’re in control of what goes into them. That means you can avoid all the extra salt, sugar, and preservatives that are often found in store-bought canned goods. Plus, you can make sure you’re using high-quality ingredients, like fresh, organic produce that is grown right here in Canada. This can help you maintain a healthy diet and reduce your risk of health problems down the road.

Preserving your own food can also help you reduce food waste, the reason being that when you have an abundance of fruits and veggies, it can be tough to use them all up before they go bad. But by canning or pickling them, you can extend their shelf life by months, or even years. This means you can enjoy your favorite foods all year round without having to worry about them spoiling.

And let’s not forget about the satisfaction that comes with making your own preserves. There’s something special about filling up jars with your own homemade jams or pickles. It’s a great way to connect with your food and appreciate the effort that goes into growing and preparing it.

So if you’re looking for a way to save money on food and eat healthier, why not consider making your own preserves. Not only will you be getting back to your roots and embracing a bit of country living, but you’ll also be doing your body and your wallet a favor. So go ahead and give it a try – you might just be surprised at how easy and fun it is! GW

Eating Meat

Some have asked George, what do you think about eating the meat that is out there today? Well, it’s my opinion that it’s important to eat both meat and veggies, especially the fresh organic things that are grown right here in Canada by our hardworking farmers.

First off, meat is a mighty fine source of protein and other important nutrients like iron and vitamin B12. It can help build and repair muscles, keep your immune system strong, and give you plenty of energy to work hard and play harder. But just like with anything, too much of a good thing ain’t always good. Eating too much meat can lead to health problems like heart disease and high cholesterol.

That’s where fresh veggies and fruits come in. They’re packed with all kinds of good stuff, like vitamins, minerals, and fiber. Eating plenty of veggies and fruits can help you feel full, give you energy, and keep your body healthy and strong. Plus, they taste darn good, especially when they’re grown right here in Canada by our local farmers.

When you eat veggies and fruits that are in season and grown close to home, you’re supporting your local community and helping to reduce your carbon footprint. That’s because food that’s grown locally doesn’t have to travel as far to get to your plate, which means less fuel is needed to transport it.

Plus, when you buy from Canadian farmers, you know you’re getting food that’s been grown with care and attention to quality. Our farmers work hard to produce the best crops possible, using sustainable and environmentally-friendly practices that protect the land for future generations.

So, for what it’s worth, I feel it’s important to eat meat occasionally to get the protein and nutrients your body needs, but it’s also crucial to eat plenty of fresh veggies and fruits, especially the ones grown right here in Canada. Not only will you be supporting your local community, but you’ll also be doing your part to take care of your health and the environment.

That’s all I have on the subject. GW

Putting up Birdhouses

Here’s a blog post on why I think putting up bird houses is a good idea these days.

Nowadays, there’s a lot of talk about how we need to take care of the planet. And one way we can do that is by puttin’ up bird houses. You might be wonderin’, “Why in tarnation should I put up a bird house? Ain’t birds supposed to just find their own homes?” Well, let me tell you, there are a few good reasons why you should consider puttin’ up a bird house or two.

  1. Helpin’ Out the Feathered Friends

First and foremost, bird houses give our feathered friends a safe and cozy place to call home. With so much development happenin’ these days, there ain’t as many natural spaces for birds to nest in. By puttin’ up a bird house, you’re givin’ them a place to raise their young ‘uns without worryin’ about predators or other dangers.

  1. Keepin’ the Critters in Check

Believe it or not, birds are nature’s pest control. They eat bugs, insects, and other critters that might damage your garden or crops. By attractin’ birds to your yard with a bird house, you’re helpin’ to keep those pests in check without the need for harmful chemicals or other measures.

  1. Connectin’ with Nature

There’s somethin’ mighty special about watchin’ birds go about their daily business. They’re colorful, graceful, and just plain fascinatin’ to watch. By puttin’ up a bird house, you’re givin’ yourself a chance to connect with nature in a whole new way.

  1. Decoratin’ Your Yard

Let’s be honest, bird houses can also add a touch of rustic charm to your yard. They come in all sorts of shapes and sizes, so you can find one that fits your style. Plus, they make for a fun DIY project if you’re handy with tools and materials.

So there you have it, folks. Four good reasons why puttin’ up a bird house is a mighty fine idea. Whether you’re lookin’ to help out your feathered friends, keep pests in check, connect with nature, or just add a bit of country charm to your yard, a bird house can do the trick. So get out there, grab yourself a bird house, and start attractin’ some feathered friends to your neck of the woods! GW

Morel Mushrooms

It’s That Time Of Year!

Morel mushrooms are a delicacy for food enthusiasts, known for their unique and earthy flavor. These mushrooms are found in the wild and are sought after by foragers during spring. In this blog post, I will discuss where to look for morel mushrooms, how to identify them, and how to prepare them for eating.

Where to Look for Morel Mushrooms

Morel mushrooms are typically found in moist areas such as woodlands, forests, and riverbanks. They prefer to grow in areas with a moderate climate and a good amount of rainfall. If you’re looking to find morel mushrooms, it’s best to head out in the springtime, typically between late March and early May, depending on your location.

When looking for morel mushrooms, it’s important to keep an eye out for dead or dying trees, especially those with bark that’s peeling away. The mushrooms tend to grow near the base of these trees, so be sure to check around the roots as well. Morels can also be found near streams and other bodies of water.

How to Identify Morel Mushrooms

Identifying morel mushrooms can be tricky, but there are a few key characteristics to look for. Morels have a distinct shape that sets them apart from other mushrooms. They are cone-shaped with a ridged and pitted exterior. The ridges run vertically along the cap and the stem, while the pits are deep and honeycombed.

The cap of a morel mushroom is typically 1-4 inches tall and 1–2 inches wide. It’s important to note that the cap will be attached directly to the stem, rather than being free like many other mushrooms. The stem of a morel mushroom is usually 2–4 inches long and about the same width as the cap.

When identifying morels, it’s also important to note their color. Morels can range in color from light brown to dark brown, and they may even have a yellow or grayish hue. The color can vary depending on the location and age of the mushroom.

How to Prepare Morel Mushrooms for Eating

Once you’ve harvested your morel mushrooms, it’s important to clean them thoroughly before cooking. Morels have a tendency to collect dirt and debris, so be sure to rinse them thoroughly in cold water. Some foragers even soak the mushrooms in saltwater for a few hours to remove any insects or debris that may be hidden inside.

Morel mushrooms can be prepared in a variety of ways, including sautéed, roasted, or fried. One popular way to prepare morels is to stuff them with a mixture of cheese, breadcrumbs, and herbs before baking them in the oven. They can also be added to soups and stews for a hearty and flavorful addition.

When is the Best Time to Harvest Morel Mushrooms?

The best time to harvest morel mushrooms is in the springtime, typically between late March and early May. The exact timing can vary depending on your location and the weather conditions. It’s important to wait until the mushrooms have fully matured before harvesting them, as immature morels can be toxic. So if you’re unsure, it is best to ask an expert as with any mushroom, Mushrooms are delicious, but there are a lot that are deadly.

In conclusion, morel mushrooms are a tasty and unique addition to any meal. If you’re looking to forage for morels, be sure to head out in the springtime and keep an eye out for dead or dying trees. When identifying morels, look for their distinct cone shape, ridged and pitted exterior, and range of colors. And when preparing them for eating, be sure to clean them thoroughly and experiment with different cooking methods.